Sharpie Tie Dye Quilt – a family treasure
My friend, Kathy Haddock posted pictures on Facebook that I had to share with my CCA families. What a grand idea for the whole family to create the quilt blocks for a handmade family vacation souvenir. She willingly agreed to write up the activity for us.
Sharpie Tie Dye Quilt
Designed by: Kathy Haddock
Every year when we travel home to visit my family in New Hampshire I try to think up a craft that we can all do together. Some years it is jewelry making, one year it was doing crazy chemistry experiments and filming them, and last year was making a quilt. I wanted everyone in the family to participate in making the quilt, including my parents who are in their eighties. I had made t-shirts using the Sharpie tie dye technique and figured that this could translate to quilt squares.
I used 100% cotton white cotton fabric that I had on hand and cut twelve squares, each square measuring 12-1/2 inches on each side. Other materials needed are Sharpie markers (the more colors the better) and rubbing alcohol.

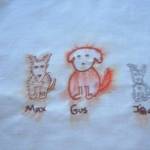
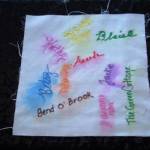
 I asked everyone to take a square and draw things from around the lake. We ended up with kayaks on the water, family dogs, Mom’s flower boxes, the American flag which is flown from the deck, blueberry bushes, fish, and other scenes. I saved two squares specifically for signatures and to write the names of my parents’ cottages. It isn’t necessary to add a lot of different colors to each square as when the ink runs from the application of the alcohol the colors will appear muddy if there are too many (that are close together) on the square. Also, the drawings do not need to be too complicated for the same reason, so this is a perfect craft for young children, with adult help. Other tips are don’t bear down too hard with the Sharpie, as smaller shapes and words will be difficult to distinguish, and make sure you have paper under the fabric while drawing on it as the Sharpie ink will bleed through.
The next step should be done only by an adult. Now that all of the drawings are completed the alcohol will be applied. Again, this step needs to be done over a pile of rags or on a glass top table so that the ink does not stain as it bleeds from the alcohol application. I did this on a glass top table and had no trouble removing an ink afterwards, but I did not let it dry first.
Place the fabric square on the absorbent cloth or glass. Using an eye dropper or plastic teaspoon, carefully drip alcohol over the drawing beginning in the center. The ink should immediately start to run. Use the alcohol sparingly as you don’t want to muddy up the picture. Only use enough to get the “tie dye” effect that you want. Once one square is completed hang it to dry where the drippings from it won’t stain. If working on glass, I recommend wiping up so that any ink left on the glass from the first picture is not picked up by the next. Continue until all squares are completed, hanging each to dry. Once completely dry, I ironed them to further set the colors.
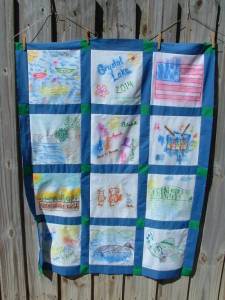
I set my squares into a 3 by 4 square quilt pattern. Another way to use this idea is to make individual pillows for each of the square-painters for a keepsake from a family reunion. As I brought the squares home with me last summer I had time to further work on them and spent time embroidering details on each square. I outlined everyone’s signature to make these stand out and enhanced some of the drawings that had become a bit muddled. It was a lot of work, but definitely worth it!
Thank you Kathy Haddock for your wonderful family vacation craft project idea. I trust our readers will also check out Kathy’s blog Aura Verde Crafts for more great craft ideas.
I would also like to piggyback on Kathy’s quilt idea to suggest another way children can draw and color their pictures using the crayon colored quilt block technique described in a post I once made on my Bible Quilts blog: Crayon-colored Bible quilts post.


We did a project similar to the crayon blocks one year. The little ones colored the pictures, and the older ones (7th graders) made it into a quilt which was then donated to a needy family in the community.
I know that must have been fun. It is so easy to color quilt blocks.
What a cute idea! Thanks for sharing it with us!
Thanks Linda. I was tickled to find this on FB and even more delighted that Kathy was willing to write it up for our blog.